|
Fitting a TV card to an IYONIX computer
(instructions courtesy of Chris Terran)
These instructions show how to fit a TV card to an
IYONIX PC. Suitable cards are listed here, where you can also find driver software written by Simon Wilson.
It's a simple procedure, but read through these instructions carefully
before doing anything. I've assumed no hardware experience whatsoever.
Disclaimer
All modifications to your computer are done at your own risk. If you're at all unsure about these instructions, contact your dealer. Be aware that modifying your machine may invalidate the guarantee.
You will need:
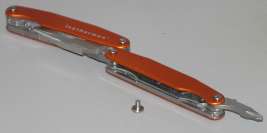
- A small Philips screwdriver (illustrated is my trusty Leatherman)
-
One standard PC fitting screw. You can get this from any electronics supplier, or you may get one with the card.
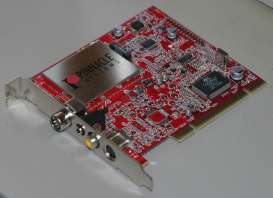
- An IYONIX-compatible PCI TV card. This is the
Pinnacle Rave, available in the UK for about Ł30.
Instructions
First, shut down your computer from the task menu. Turn off the power using the switch at the back, and unplug all leads from the computer. Wait a few minutes for any residual charge to decay.
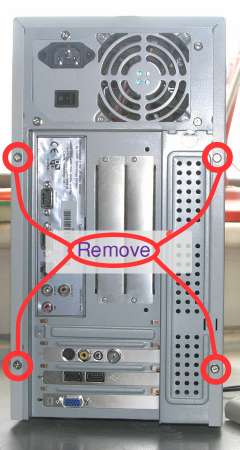
Remove
the case. This picture shows the back of an IYONIX. To take off the
outer casing, remove the four small screws indicated and put them
somewhere safe. Note that this shot was taken after the PCTV card was fitted - it's the row of sockets just above the USB ports.
Grip the sides of the computer, and gently lift and slide the casing
away from the front (that is, towards you in this view). It should come
easily.
Put the case somewhere safe, and before doing anything else, earth yourself.
Touch a nearby radiator, or the computer's power supply casing - that's
the large metal object inside the case at top rear, where the mains
lead plugs in. If you move around at all, repeat the process.
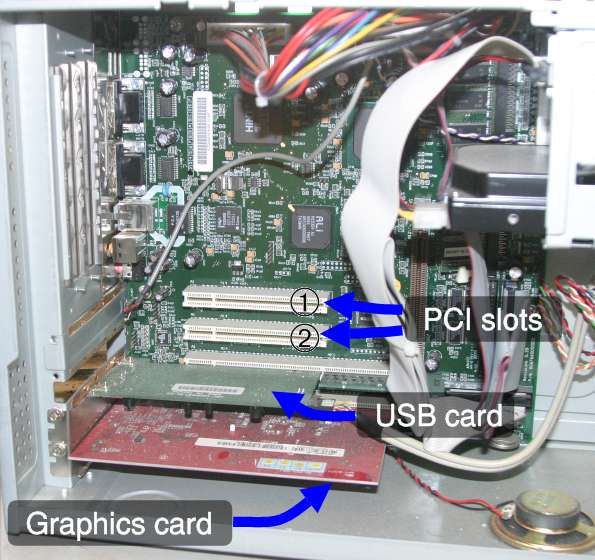
Here's the inside, with various parts marked. The TV card will go in
one of the PCI slots indicated. You can use either, but the slot
labelled 2 is best - there appears to be a small set of links which
could obstruct slot 1. Note that the slot has a cover on it (it's been removed in the
above picture). Unlike many computers it's not screwed on, just
clipped. Taking it off is a bit tricky, so be careful.
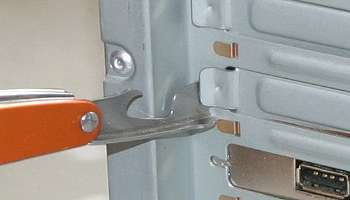
Carefully
lever the slot cover as indicated, applying gentle pressure and keeping
a finger on the other side to stop it falling. It should eventually pop
out. Put it aside and keep in a safe place for possible future use.
Unpack the TV card. As usual, the large packaging is mostly
empty air. Turn it so it's the right way round (electronics underneath,
the right-angle metal fitting bracket towards you), and position as
here:

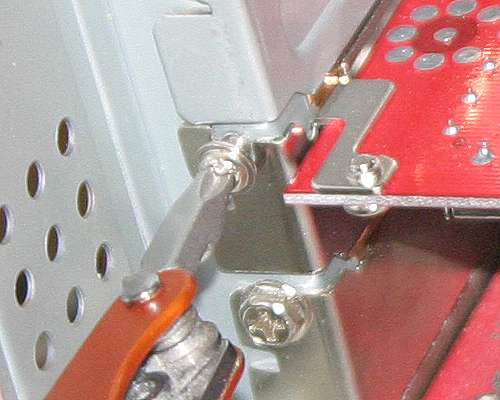
Make
sure the card aligns correctly with the PCI socket - there are two
alignment slots to help - and the external sockets poke through the
hole to the outside. Push gently
and it should go in. Make sure it's in all the way, so the metal
fitting bracket is flush against the case. You may find that gentle
rocking helps.
Now fix the card to the case with the fitting screw. Don't over-turn it - the threads are easily stripped.
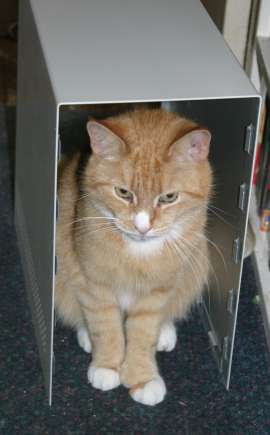
Finally,
reassemble the case, first discarding any cats who've taken a fancy to
it. When putting the case back on, make sure the internal flanges align
correctly with the corresponding elements of the body.
While you've got easy access to the back of the
machine, connect up any relevant cables to the TV card. The Rave card includes
sockets for video in, a standard TV aerial connector, and audio out. To receive
TV programs, just plug a normal aerial into the appropriate socket. The video in
socket will accept input from many digicams as well as video cameras, VCRs etc.
Audio can be set up in a couple of ways. The Rave comes with a short flying lead
which you can use to connect the audio output of the card to the audio input
socket of the IYONIX. This is the simplest way to connect it up, and it works
well. Ensure that "Line in" is enabled in the Sound section of Configure, and
the volume is non-zero. Sound will then be channelled
through the IYONIX to whatever output device you use, and you can mix the TV
card sound output with any other source.
Alternatively, it's possible to use an internal connection from the card to
connector pl801 on the IYONIX motherboard. You'll need a standard audio
connector of the type used to connect the CD audio, and the sound will appear as
"Aux in 3" rather than "Line in" (sadly, it appears that "Aux in 2" is not
functional). The pl801 connector is just by PCI slot 2. This method has the
advantage of freeing the "Line in" socket for other uses.
Now to try it out. This is the part known as "plug and pray" - refit all the cables, switch on, and hope.
To test it out, we plugged a digicam into the card. Any camera
with a video out facility should work, and will display in real time
whatever would normally be on the camera's preview screen. In effect,
it's a webcam. A suitable cable is usually provided with the camera.
Run the PCITV software, click on the iconbar icon, and select
the "1" icon. You should get a blue screen. Plug the cable into the
camera and the yellow socket of the PCTV card, turn it on, and...
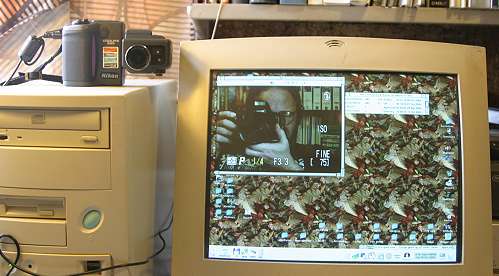
...here's
a picture of me taking a picture of me while having my picture taken.
For more recursive fun, point the camera at the screen and rotate it
slowly. (So that's how they did the Dr Who intro sequence...)
The camera connected to the PCTV card is a Nikon 995, and I'm using a Canon 10D to take this picture.
Good luck! Any problems, drop me a line. |